
Scenarios and matrices
Record QA scenarios, import CSV datasets, run browser × device × location matrices, compare screenshots, schedule runs and export JSON, JUnit or HTML.
Last updated
QA automation records and runs repeatable scenarios against your own forms across browsers, devices, datasets and proxy locations, and exports reports for review or CI.
Everything runs locally in the desktop app: no sign-in, shared server, cloud account or remote worker. Open QA automation in the sidebar. Its tabs are Scenarios, Suites & environments, Results, Schedules, Data controls and Audit history.
Note: Automated runs submit forms for real. Run them against staging or test environments you own or are contracted to test, use synthetic data, and tag test submissions so they are never treated as real leads. See Responsible use.
Run your first regression check
- Create a saved browser profile in Profiles with Direct routing or a configured proxy provider. See Launching browsers.
- Open QA automation, choose or create a workspace, and click New scenario.
- Choose a base profile, enter the starting URL, and add actions and assertions, or record them (see Record actions). The starting URL's origin is approved automatically; add other approved origins explicitly when steps navigate elsewhere.
- Click Run matrix, choose installed browsers and compatible devices, and optionally add proxy locations. Unsupported browser/device combinations and location tests on a direct connection are refused before the run starts.
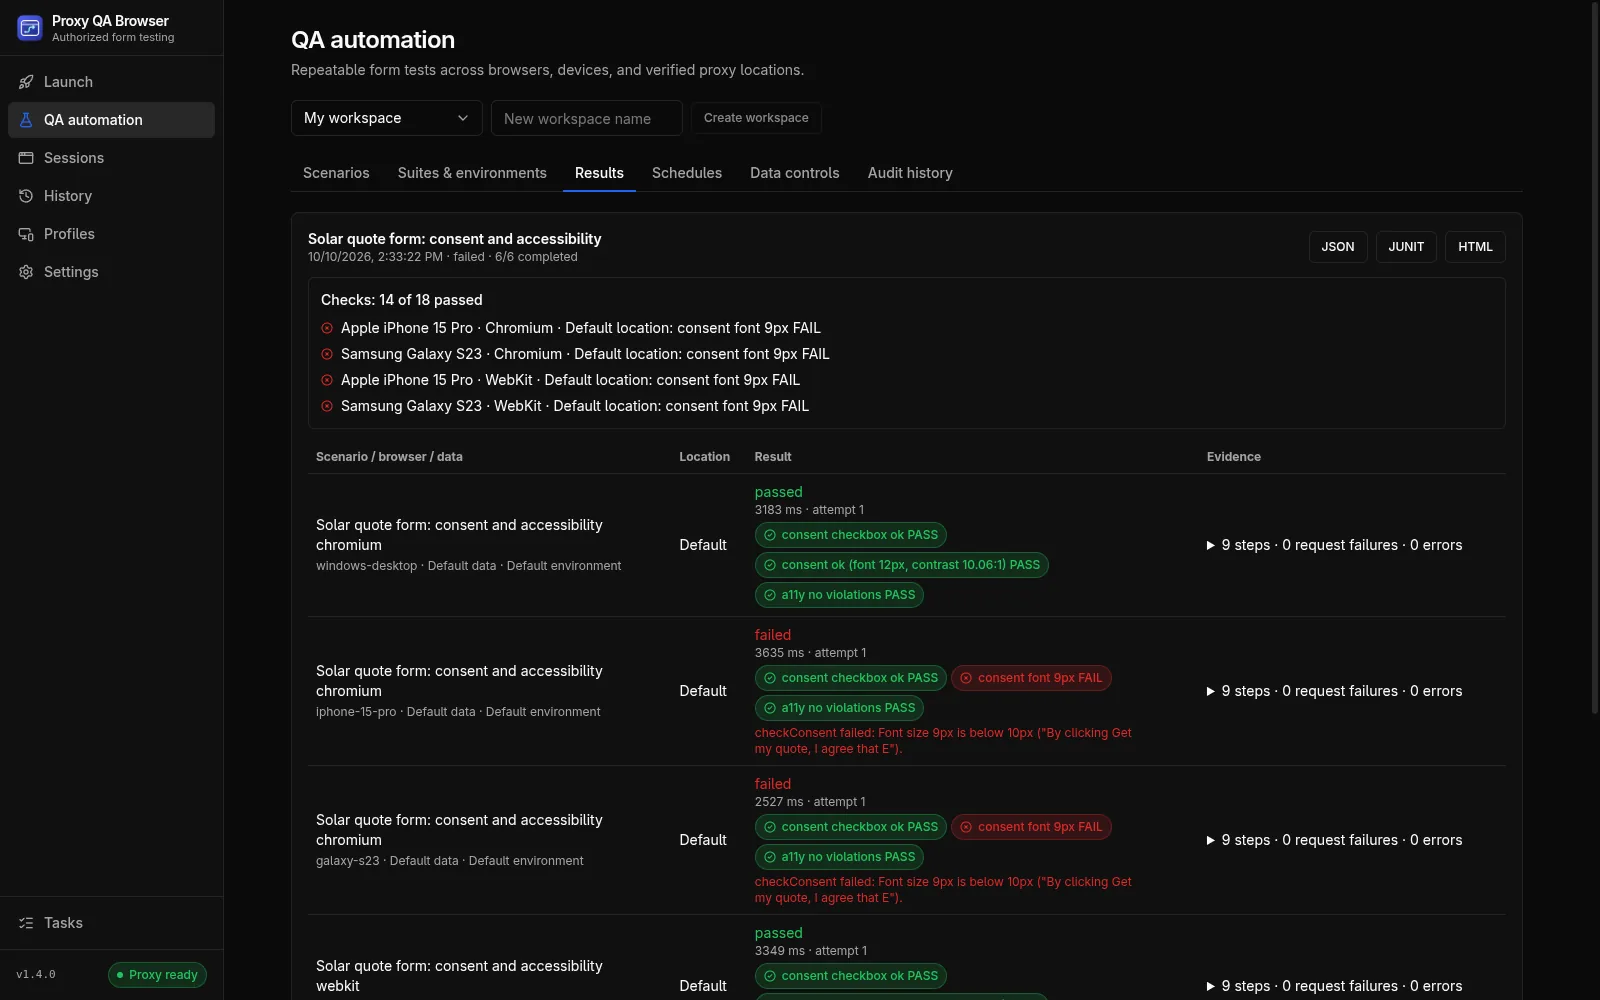
- Inspect Results: each combination's status, failure details, console errors, failed HTTP requests, step screenshots and retry counts. Export JSON, JUnit XML or standalone HTML reports.
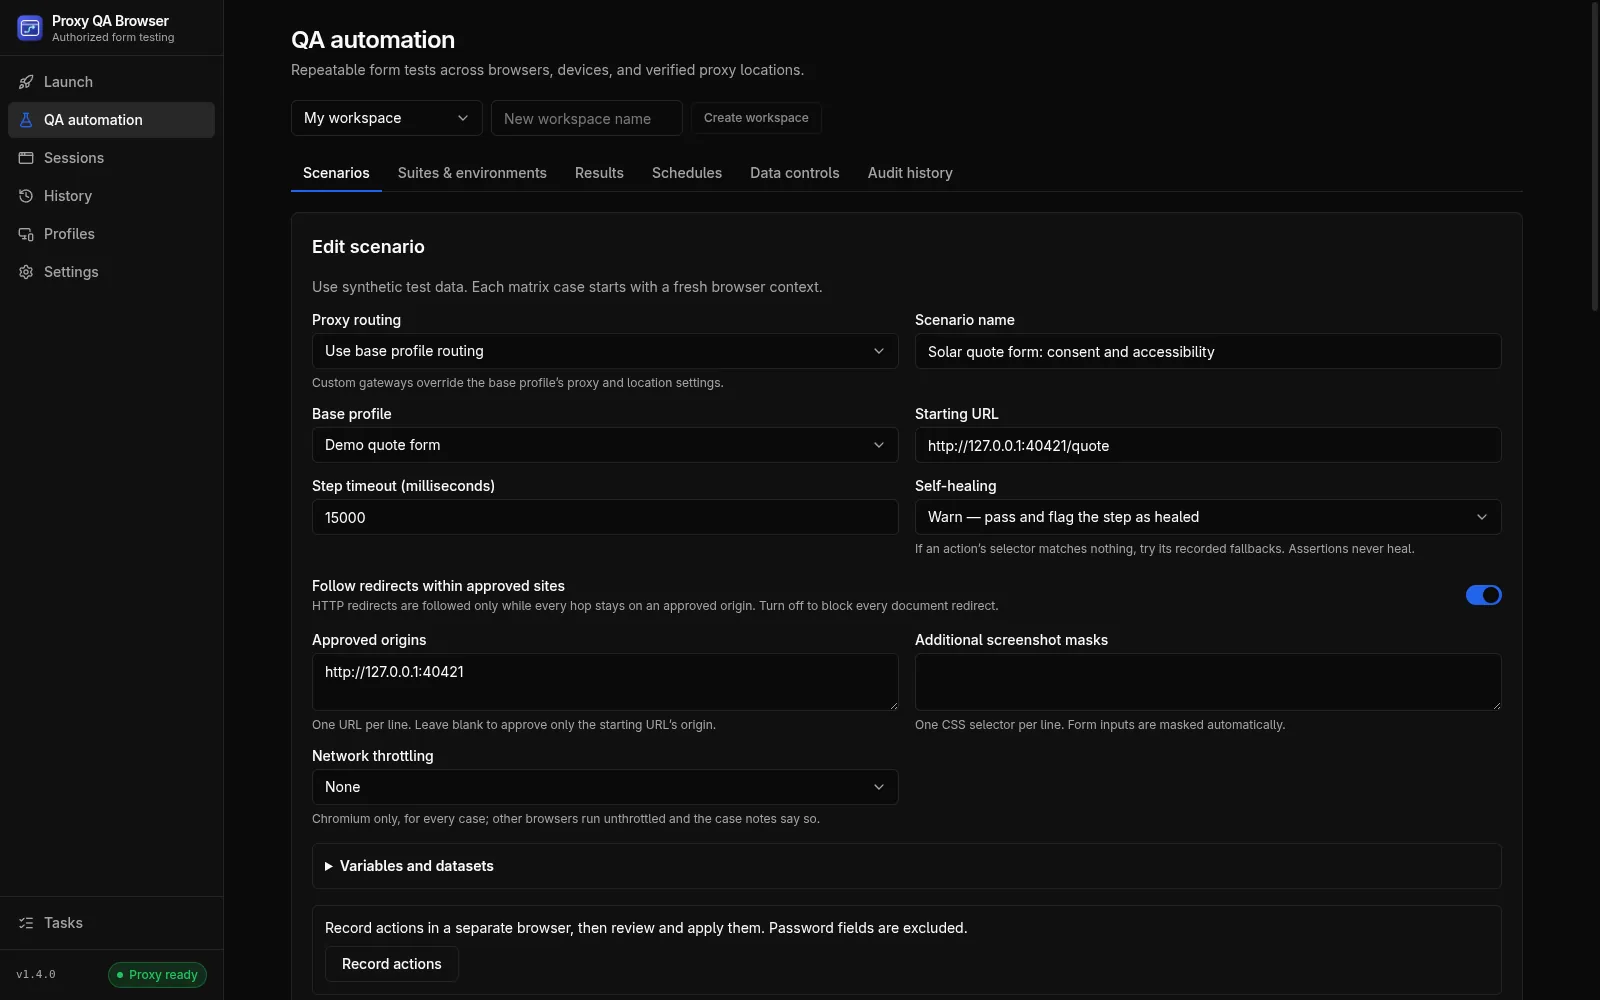
Automation runs headlessly; manual sessions keep using Launch and Sessions. Workspaces organize projects on one installation.
Steps
Step (action) |
What it does |
|---|---|
goto |
Navigate to a URL on an approved origin |
fill |
Type a value into a field |
click |
Click an element |
select |
Choose an option in a select element |
check / uncheck |
Set a checkbox |
upload |
Set one or more upload fixtures on a file input |
switchPage |
Continue on the main page or a pop-up (main, popup:1 … popup:9) |
assertVisible |
Expect an element to be visible |
assertText |
Expect an element's text |
assertUrl |
Expect the URL to contain a value |
assertStatus |
Expect the final document's HTTP status (100–599) |
assertScreenshot |
Compare a screenshot with an approved baseline (see Visual comparisons) |
checkConsent, checkConsentCheckbox, checkScriptLoaded, checkAccessibility, checkPerformance |
Consent, accessibility and performance checks; see Checks |
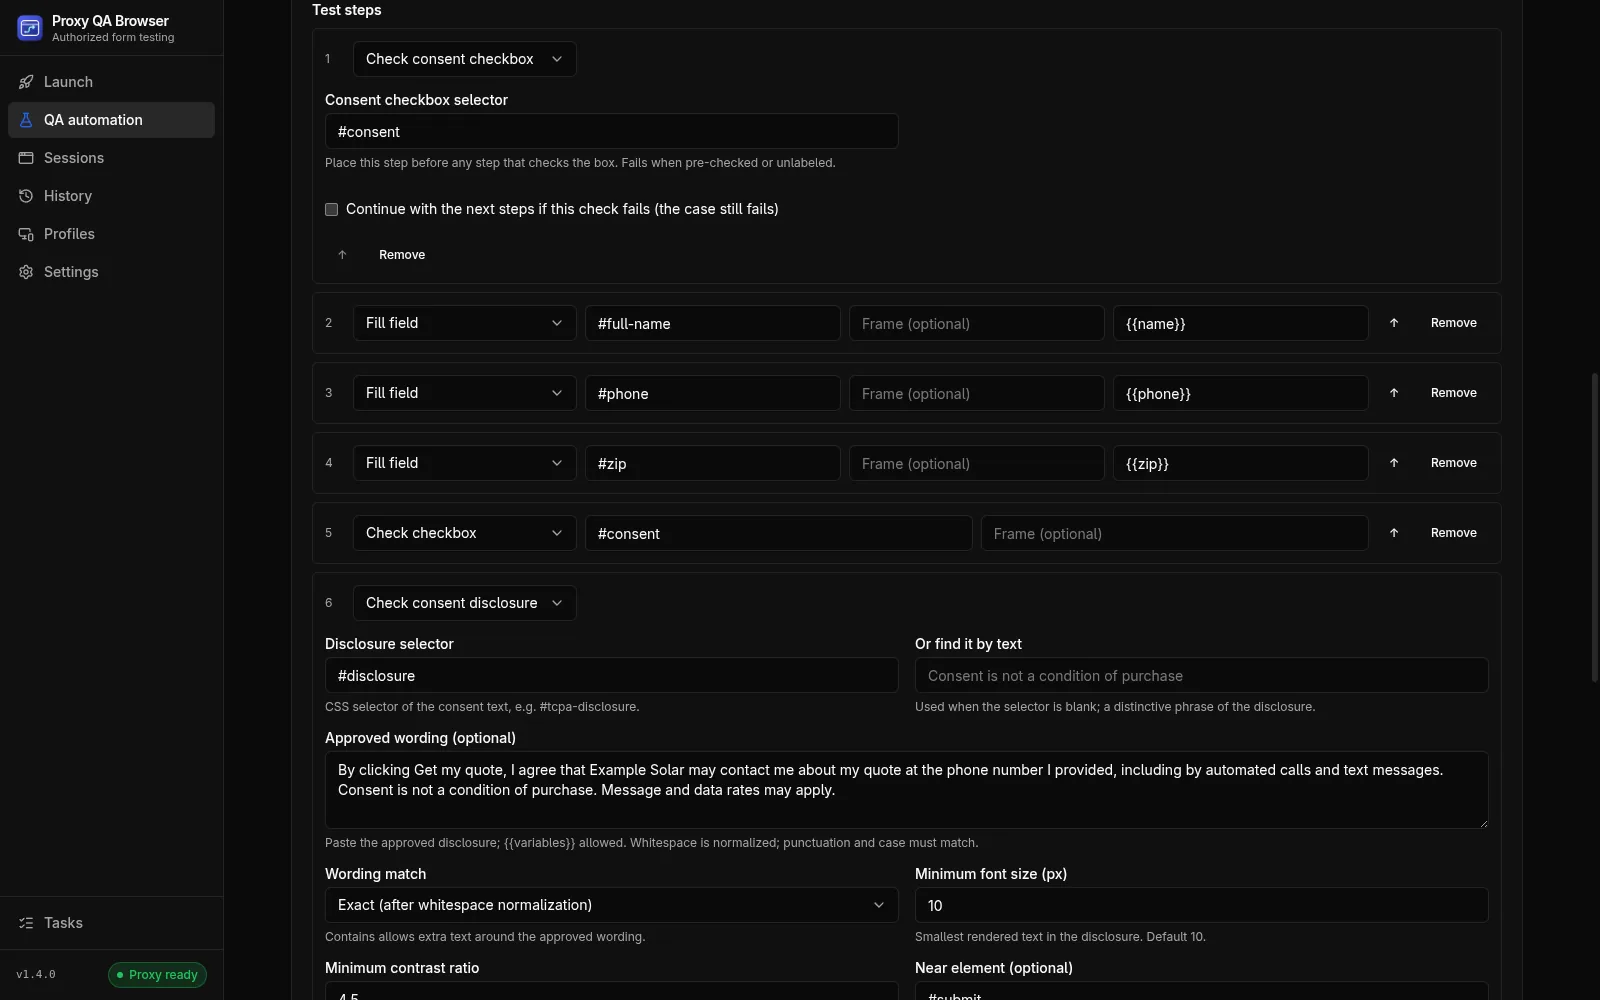
A scenario has 1–100 steps and a per-step timeout of 1–60 seconds (15 seconds by default). Text, visibility and URL assertions wait within the step timeout. Action steps can carry self-healing fallbacks; see Self-healing selectors.
Each case and each retry runs in a fresh browser context with a temporary profile, without modifying the saved base profile. Arbitrary JavaScript steps are not supported.
Record actions
In the scenario editor, enter a starting URL and choose Record actions. A separate visible browser opens with a temporary profile. For an overview, see record-and-playback testing.
- Interact with your test form.
- Click Stop recording in the app, then Use recorded steps.
- Review the steps, add expected-result assertions and save.
The recorder captures text inputs, single-select choices, checkbox changes, button and link clicks, and file choices; repeated typing in one field becomes one fill step. Only real user input is recorded, not events a page script dispatches. The recording stays a draft in memory until you save.
What is not recorded:
- Password fields and elements marked
data-qa-sensitive, including in frames and pop-ups. - The file itself for a file choice: only the sanitized file name is stored. Attach the fixture file in the editor before saving.
- Shadow DOM, rich-text editors, drag-and-drop uploads, more than 9 pop-ups, frames nested more than 5 levels deep and special keyboard gestures. Add those steps by hand.
- Events from frames on unapproved origins; such frames are never loaded and the recording notes say so.
Ordinary text inputs are recorded as entered, so use synthetic data while recording. Starting a test or scheduled run while recording is refused.
Frames, pop-ups and file uploads
- Frames. Action steps take an optional frame path: the CSS selectors of the iframes from the page down to the frame, separated by
>>in the editor (for exampleiframe#checkout >> iframe.card-number, at most 5 levels). Each frame's document must be on an approved origin; otherwise the step fails with a clear message instead of timing out. Assertions run on the page itself, not inside frames. - Pop-ups. Pop-ups and new tabs are numbered in opening order,
popup:1topopup:9. A Switch to page step waits for that pop-up to open and load; later steps, including assertions, run there until another Switch to page selectsmainor another pop-up. Pop-ups are held to the same approved-origin rules. - File uploads. An Upload file step sets fixtures stored inside the scenario, so exports and CI manifests are self-contained and no host path is read during a run. Use Attach fixture file in the editor. Limits: 5 fixtures, 2 MB each, 6 MB per scenario. Allowed types: png, jpg/jpeg, gif, webp, pdf, txt, csv, json, xml, rtf, doc/docx, xls/xlsx, odt and ods. Names are reduced to letters, digits,
.,_and-(My CV (final).PDFbecomesMy_CV__final_.pdf).
Note: Upload fixtures are test data. They travel with the scenario into exports, CI manifests and encrypted backups, and anyone who can read those can read the files. Use synthetic files only, never real CVs, IDs or invoices.
Variables and datasets
For data-driven tests, each dataset row, typed or imported from CSV, runs as its own case. Use synthetic data against your own staging site.
Expand Variables and datasets in the editor. Default variables are a JSON object:
{ "email": "synthetic@example.test", "expected": "Submitted" }Use {{email}} in a fill value and {{expected}} in an expected-text value. Variables can also appear in selectors and navigation URLs. Missing variables, invalid URLs and unapproved navigation stop the whole run before any browser starts.
Dataset rows have a stable id, a readable name and variables:
[
  { "id": "valid", "name": "Valid email", "variables": { "email": "valid@example.test" } },
  { "id": "empty", "name": "Empty email", "variables": { "email": "", "expected": "Email is required" } }
]
Import dataset CSV replaces the rows in the draft. Column headers become variable names; an optional _name column labels each row. Limits: 1 MB CSV, 100 rows, 50 variables and 10,000 characters per value. A matrix runs all rows by default, or only the rows checked in Datasets, each in a fresh browser context.
Variables are plain local configuration, not a secret store; they appear in configuration backups and CI exports.
Suites and environments
Under Suites & environments, save named environments and group scenarios into suites.
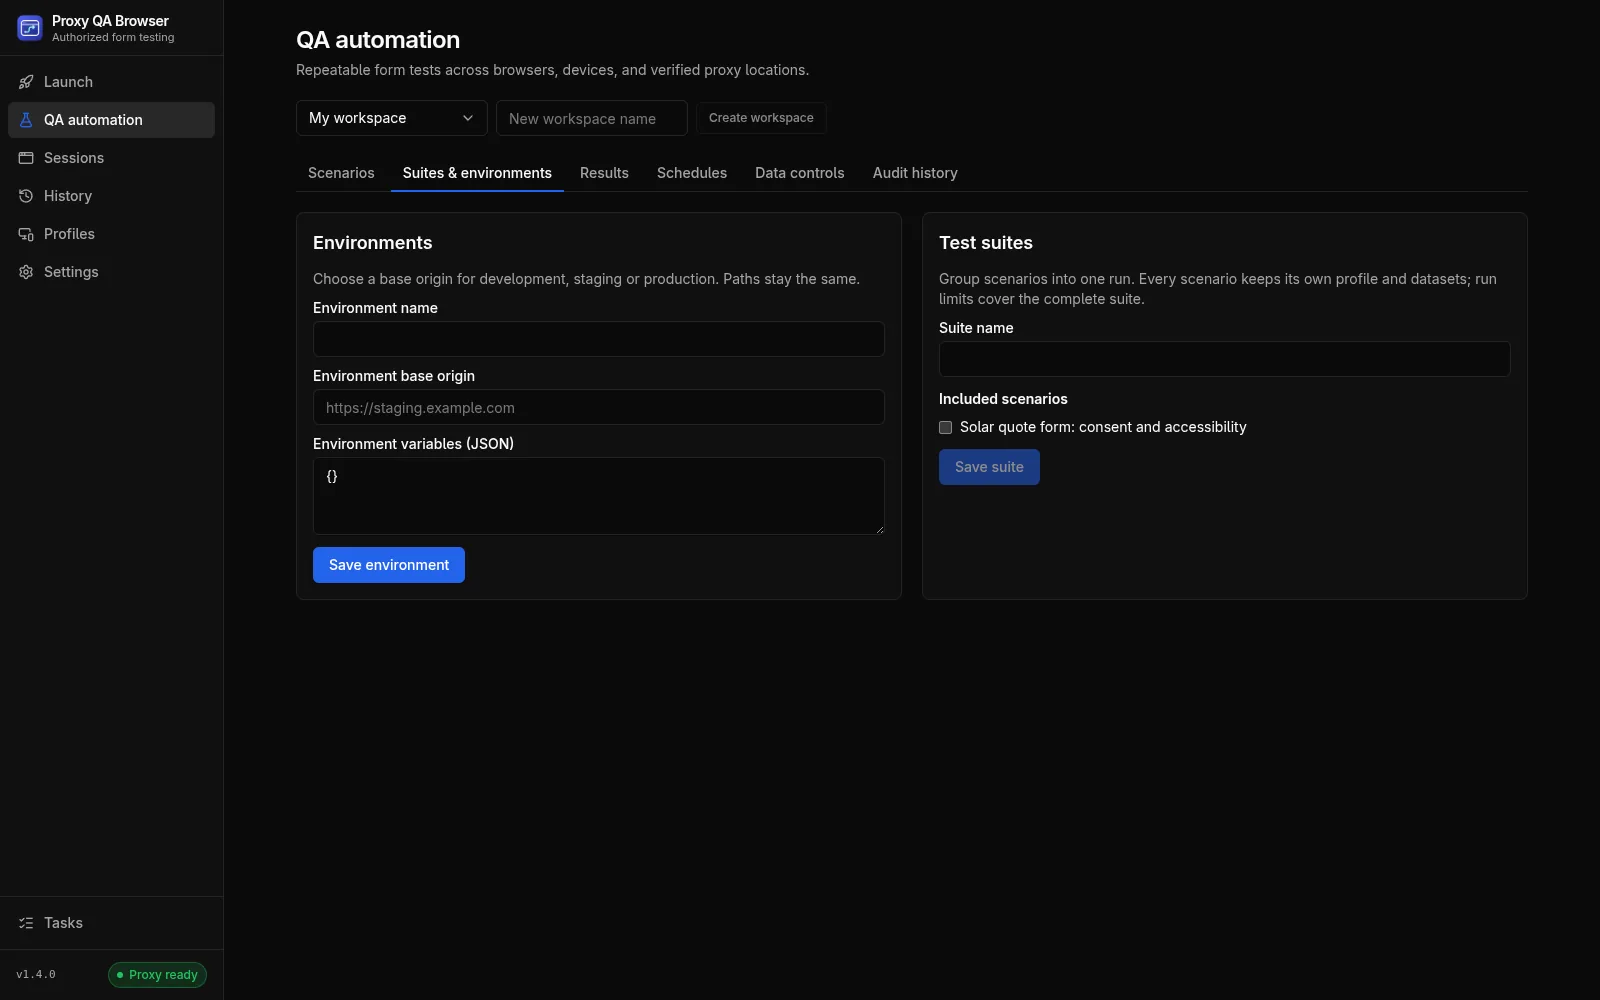
- An environment has a base HTTP or HTTPS origin and optional variables. Navigation on the scenario's starting origin is rewritten to the environment's origin; paths, queries and fragments stay the same.
baseUrlis reserved for the selected environment's origin. - Variable precedence: scenario defaults, then environment variables, then dataset values.
- Run suite: select the environment and matrix and start. Each scenario keeps its own base profile; engines and devices chosen in the matrix override those profiles. Suite runs include all datasets.
Matrices, retries and limits
A matrix is every combination of the chosen engines (up to 10), devices (up to 20), locations (up to 20) and dataset rows. Matrices are capped at 100 cases by default (Maximum cases per matrix, configurable up to 500). There is one active automation batch per installation; cases in it run concurrently up to the policy limit (1–4 browsers).
A failed case can be retried at most twice. Retrying repeats all actions, including submissions. JSON reports keep every attempt's evidence, and a case that passed after retries is marked in Results.
For proxy location matrices, the runner verifies the exit IP before opening the browser and requires an exact target match. See Exit-IP verification.
Origin isolation
Document navigation is restricted to the scenario's approved origins.
- HTTP document redirects are followed only while every hop stays on an approved origin, for example
POST /submit → 303 /thanksor/start → 302 /form. A different scheme or port is a different origin. - A 301, 302 or 303 continues as a
GET. A 307 or 308 of a formPOSTis re-sent with the same body only within the same origin; across origins it is blocked. - A hop to an unapproved origin fails the run with "Navigation to an unapproved origin (…) was blocked" before any request reaches it. A chain stops after 10 redirects.
- Every hop is recorded in the case evidence and in the JSON, HTML and JUnit reports.
assertStatuschecks the final document, so/start → 302 → /formasserts200.
To block every document redirect, turn off Follow redirects within approved sites in the scenario editor. The page's own scripts, images and API calls can still reach other origins; this is a navigation boundary, not a network firewall.
Visual comparisons
Add a Compare screenshot step with a unique baseline name and an allowed difference ratio (0–1; the default 0.01 means 1%). Screenshots use the same masks as other evidence, disable animations and wait for fonts. A worked example of visual regression testing across browsers, devices and locations is on the website.
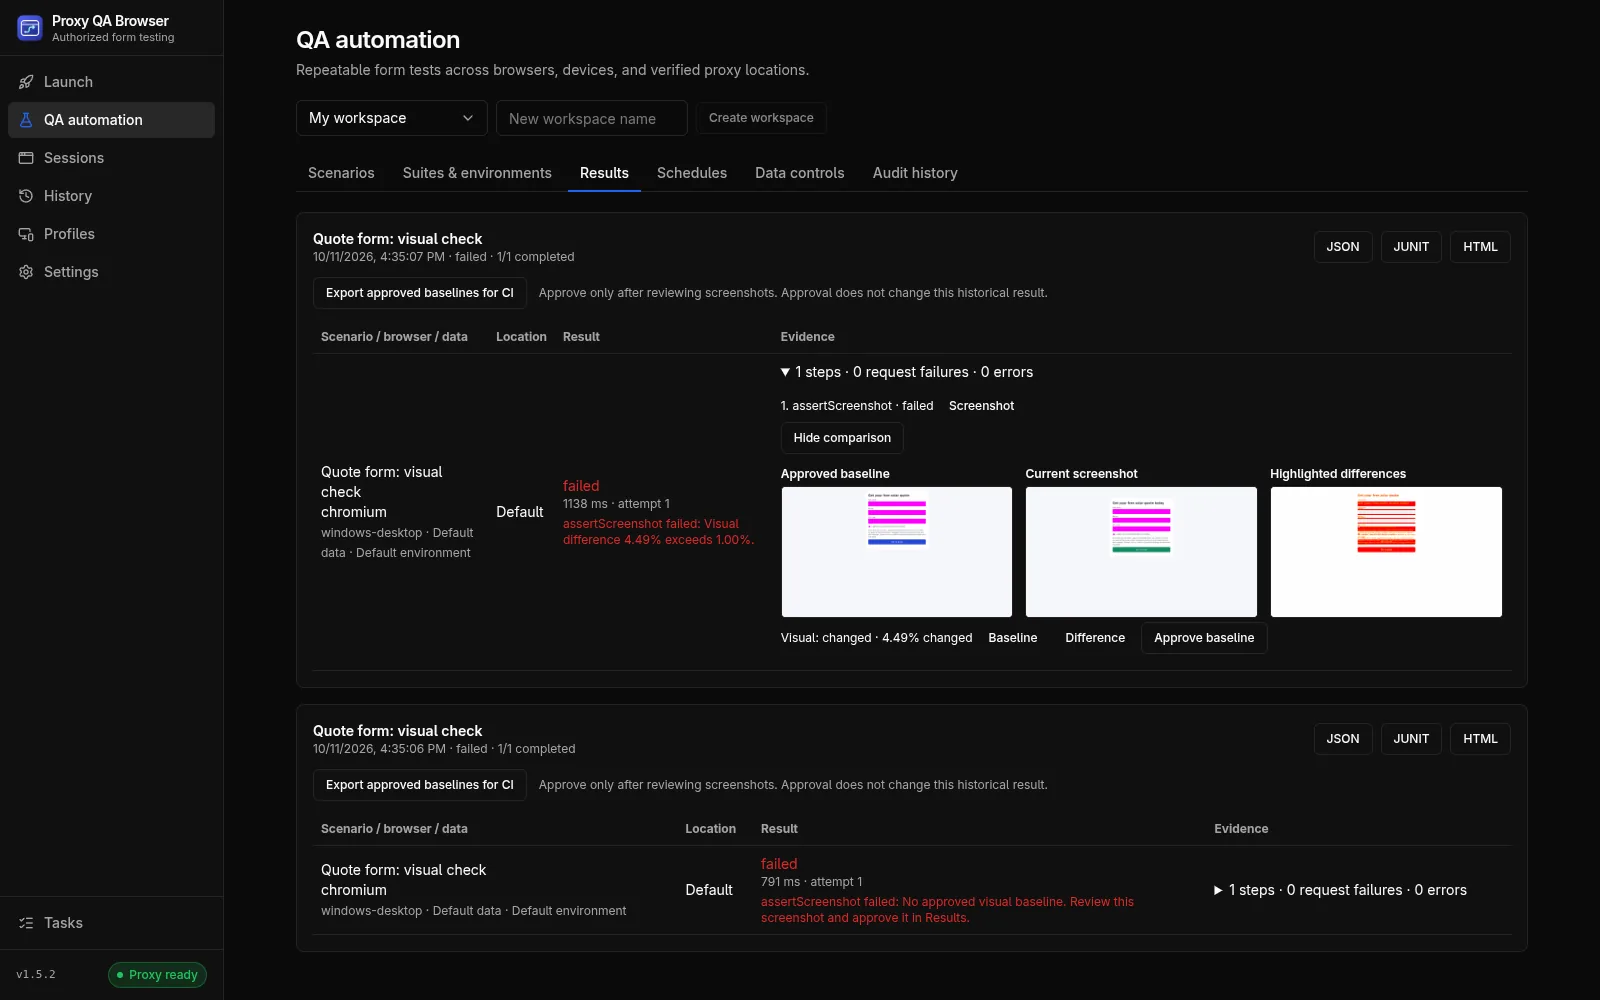
- The first run fails with No approved visual baseline.
- In Results, expand the case, choose View comparison and review the screenshot.
- Click Approve baseline, then run again to compare.
Changed runs show the approved screenshot, the current one and the highlighted differences; size changes fail. A baseline's identity includes the scenario, dataset ID, screenshot name, masks, operating system, browser and version, device and viewport, locale and timezone, location and starting origin, so browser upgrades or another CI platform may need new baselines. Export approved baselines for CI writes a .qavb pack for the CI runner. Baselines are never approved automatically.
Results and reports
Results lists each batch with every case's status, attempts, failed steps, console errors, failed requests, step screenshots, healed selectors and check outcomes. Exports:
| Format | Contents |
|---|---|
| JSON | Everything, including every attempt, redirects, healed steps and check evidence |
| JUnit XML | Test results for CI dashboards, with properties and system-out lines for checks, redirects and healed steps |
| HTML | A standalone report with screenshots, a checks table and redirect hops |
Use Export for CI on a scenario, or Export suite for CI on a suite, to produce a manifest for the CI runner.
Schedules
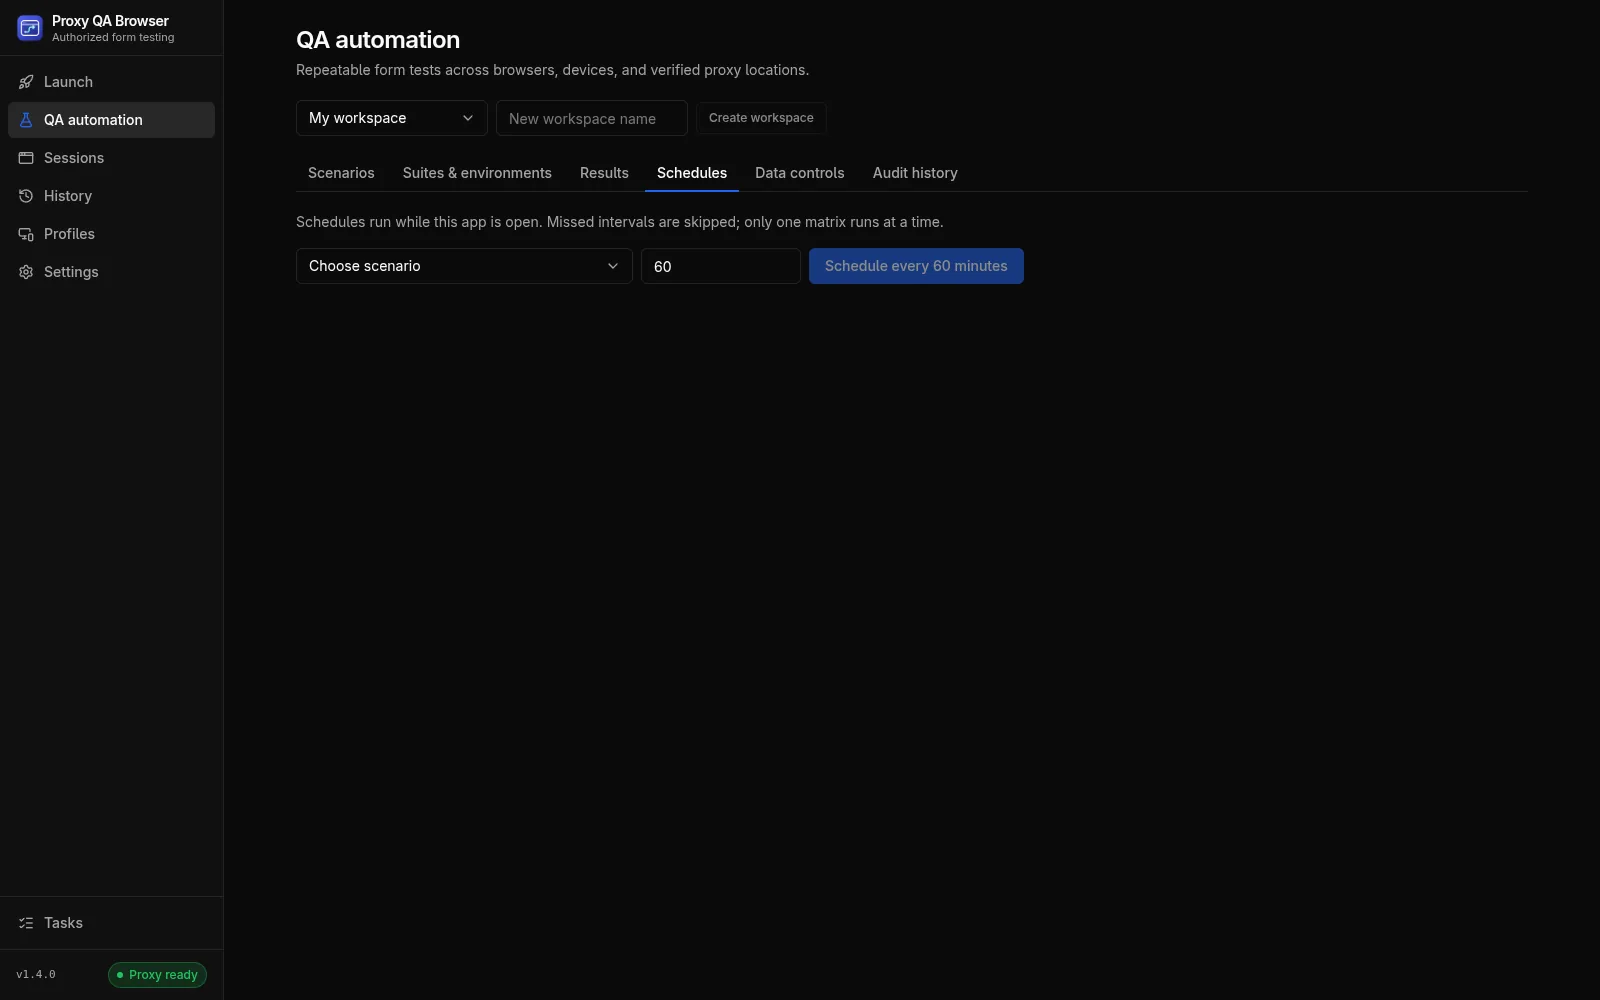
Schedules run a scenario at an interval of 5 minutes to 7 days while the app is open. Pause, resume or delete a schedule on the same tab. Missed intervals are skipped, not replayed. Each scheduled run uses the base profile with one worker and no retries; budget or validation failures appear as its last-attempt message.
Data controls
| Setting | Range | Default |
|---|---|---|
| Evidence retention | 1–3,650 days | 30 days |
| Maximum cases per matrix | 1–500 | 100 |
| Concurrent automated browsers | 1–4 | 2 |
| Daily case-attempt budget (UTC day, including requested retries) | 1–10,000 | 500 |
| Allow scenarios to capture raw traces | on / off | off |
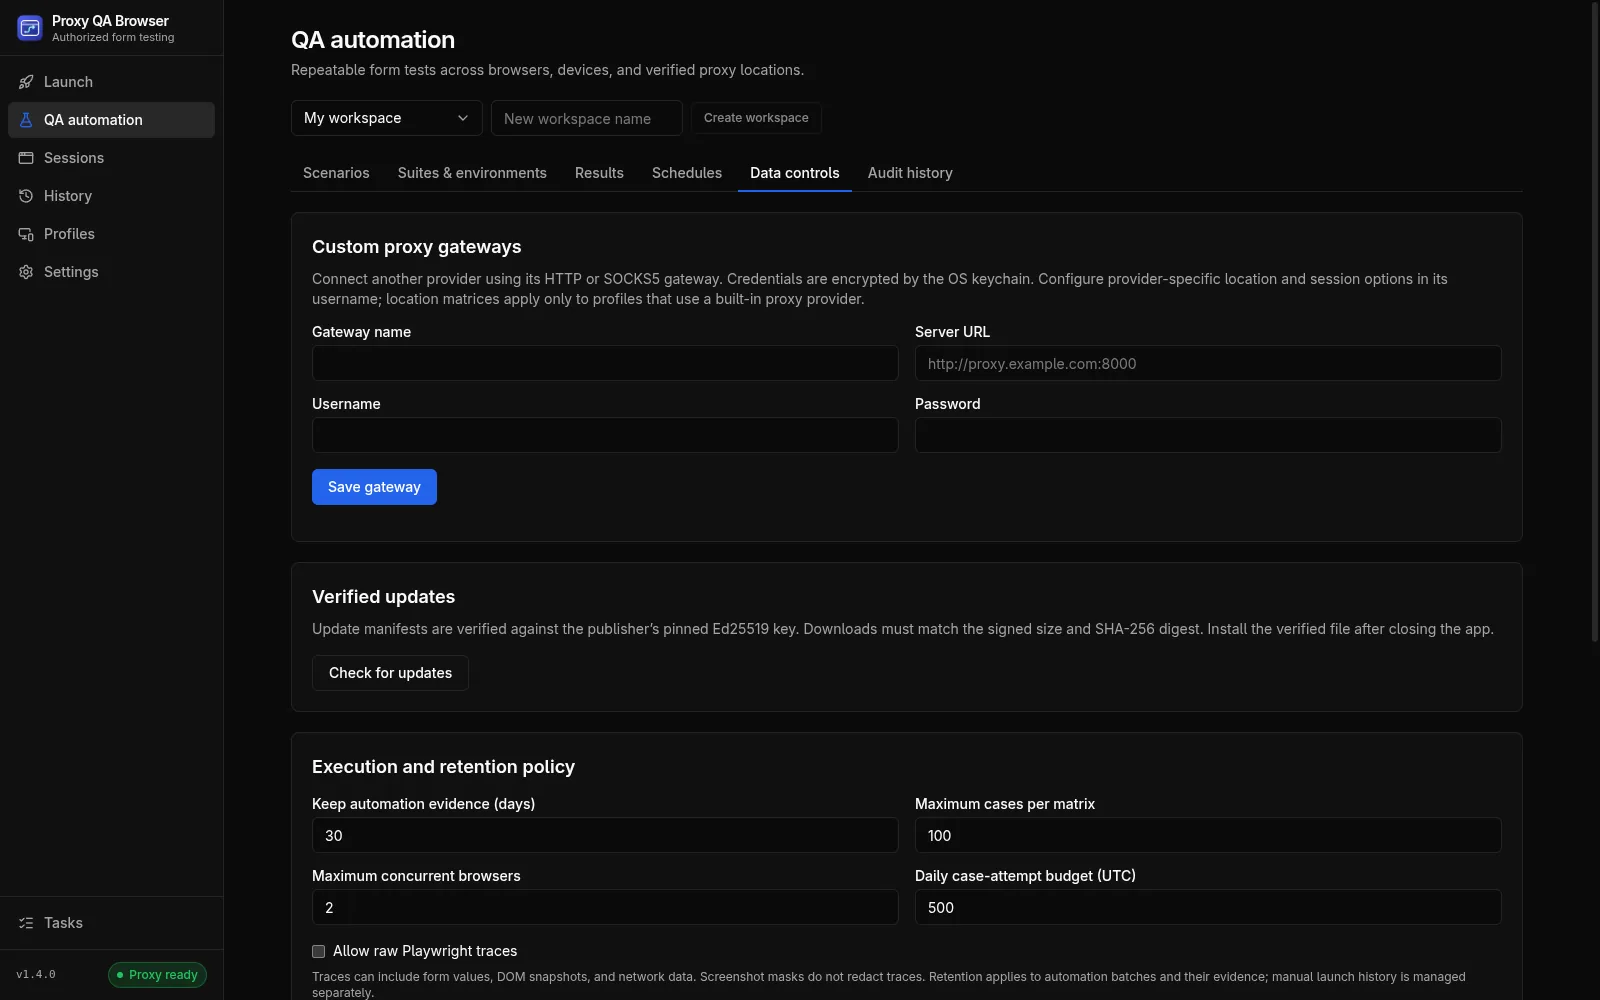
Retention removes expired completed automation records and their evidence at start-up and hourly while the app is open; Clean expired evidence runs it by hand. It does not delete manual launch history, log files, exported reports or backups.
Custom proxy gateways are also configured here; see Proxy providers.
Backup and diagnostics
- Encrypted configuration backup includes saved profiles, workspaces, scenarios (with variables, datasets and fixtures), suites, environments and a copy of the policy. It excludes proxy credentials, site access tokens, cookies, schedules, run history and screenshots. The backup is encrypted with AES-256-GCM using a key derived from a passphrase of at least 12 characters. Restore validates everything and imports independent copies; existing data is kept.
- Export diagnostics writes app and platform information, browser availability, recent batch statuses and redacted log messages. Review the file before sharing it. Nothing is uploaded automatically.
Audit history lists local records of changes made through the app. They are not authenticated-user records or tamper-proof compliance evidence.
Privacy of evidence
- Captured URLs mask known sensitive query parameters and drop fragments.
- Screenshots mask inputs, textareas, editable elements and
[data-qa-sensitive]elements by default. Add CSS selectors to mask other content. Masks do not detect personal data elsewhere on a page. - Playwright traces can contain raw DOM and network data and are not masked. They need both the policy permission and a scenario opt-in, and are skipped while a site access token is enabled.
- Screenshots and result files are local files, not an encrypted database.